


Learning Kubernetes has been one of my top priorities this year. I spent quite a lot of time finding good resources to learn and have hands-on experience with the technology.
Finally, I came across Civo Kubernetes, when one of my seniors recommended the platform to me. Yeah, it was the one I was looking for!
The Civo Kubernetes Platform provided me with fully managed K3s clusters as well as high-quality learning videos about Kubernetes from the platform developers themselves. I instantly got a $250 credit in my Civo account once I signed up with my credit card.
Introduction
I am currently in the final year of my Bachelor's degree in Computer Engineering, from KIIT University, Bhubaneswar, India.
In fact, this is my 2nd victory in a nationwide hackathon this year. Earlier this year, I had finished as the First Runners-up at the TCS Inframinds Hackathon. Apart from that, I am currently a DevOps intern at Highradius Technologies and also an enthusiastic open-source contributor.
When I got to know about the Civo Hackathon, I planned to take part in it as I needed hands-on experience with Kubernetes. Also, the speaker line-up before the commencing of the hackathon was interesting. I got to know about the platform as well as about monitoring and profiling from the developer advocates of Civo.
The hackathon spanned over the 2nd weekend of November 2021, starting from Friday, when we had the speaker sessions till Sunday evening. The results were finally announced the very next Monday.
Much to my surprise, I finished up 2nd !!!!!!

My Project
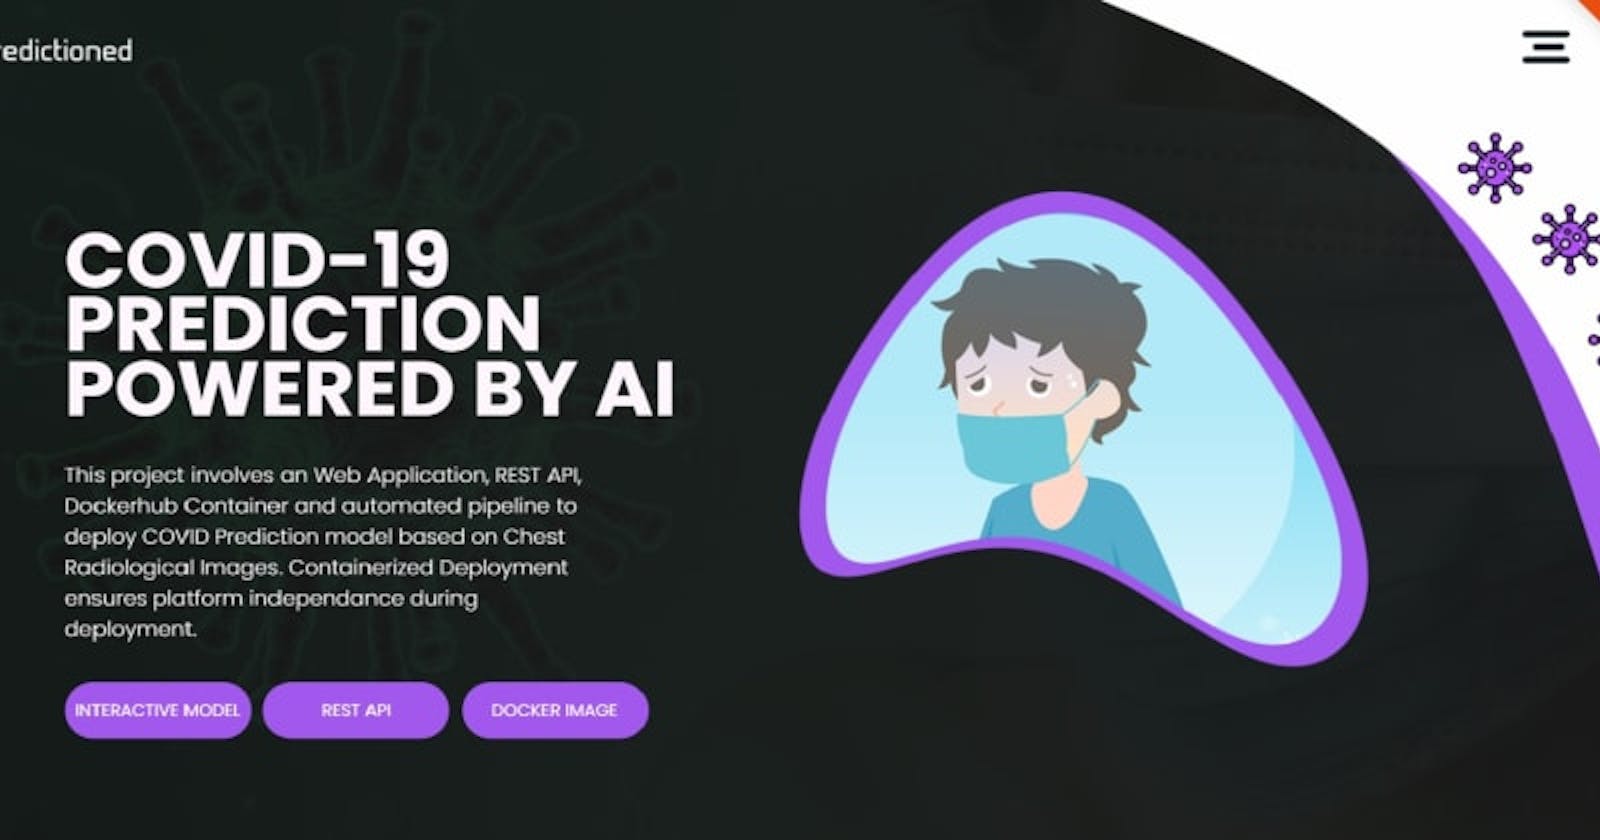
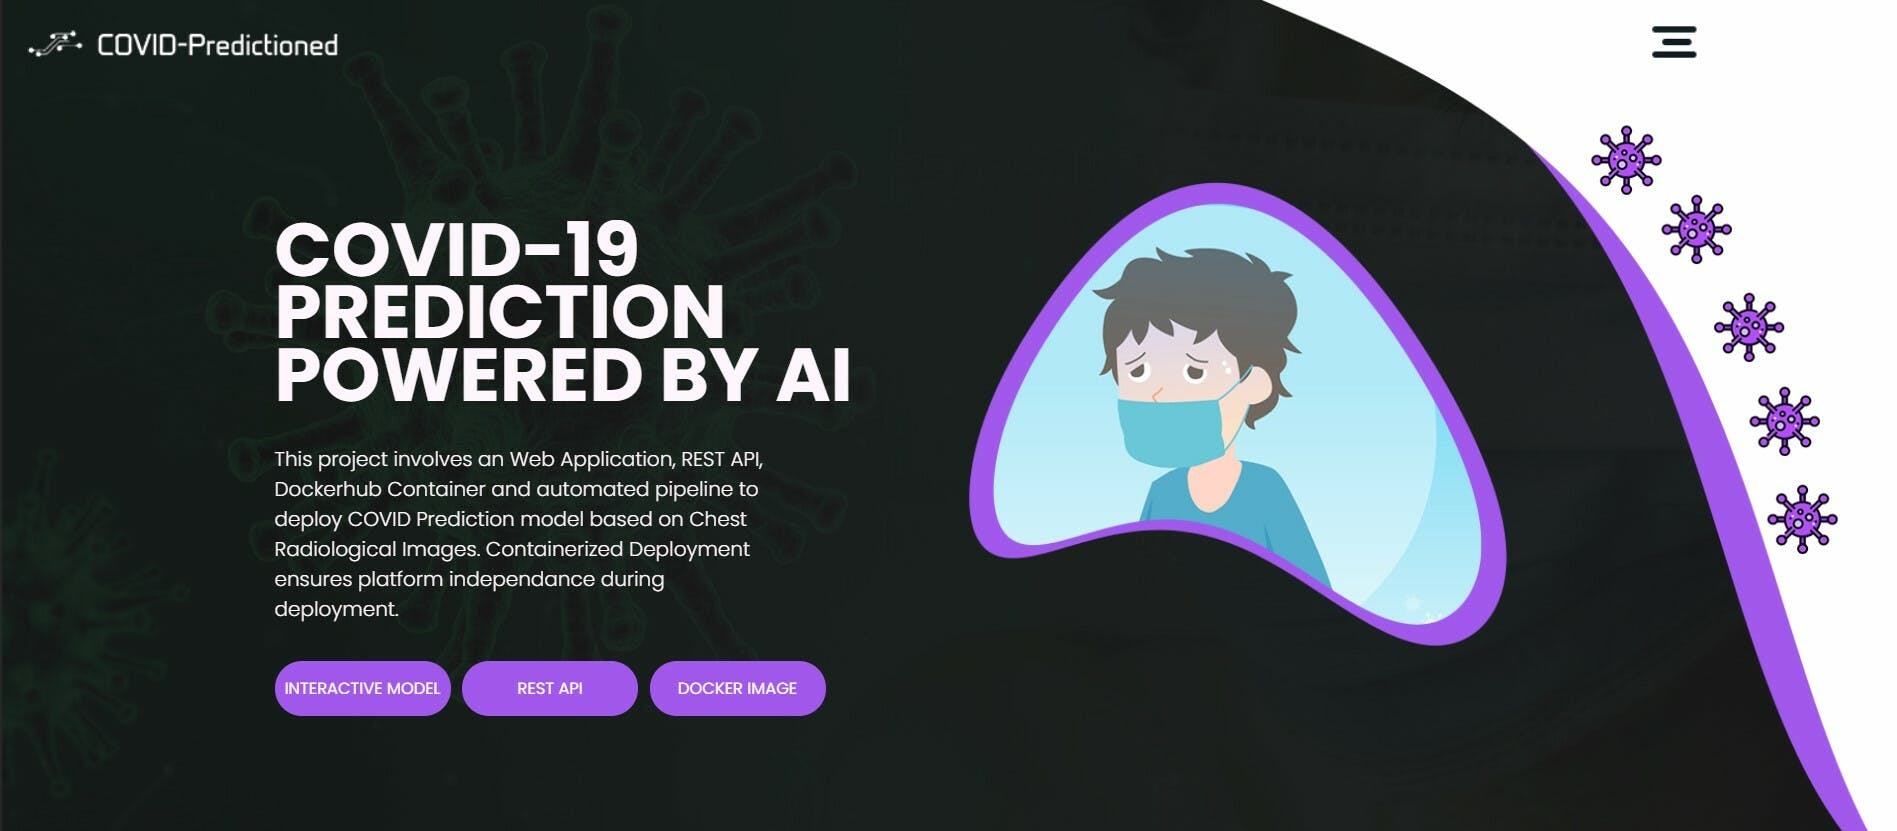
The project I built is a Computer-Aided Diagnostic System that is used to predict whether a person has been infected with COVID-19.
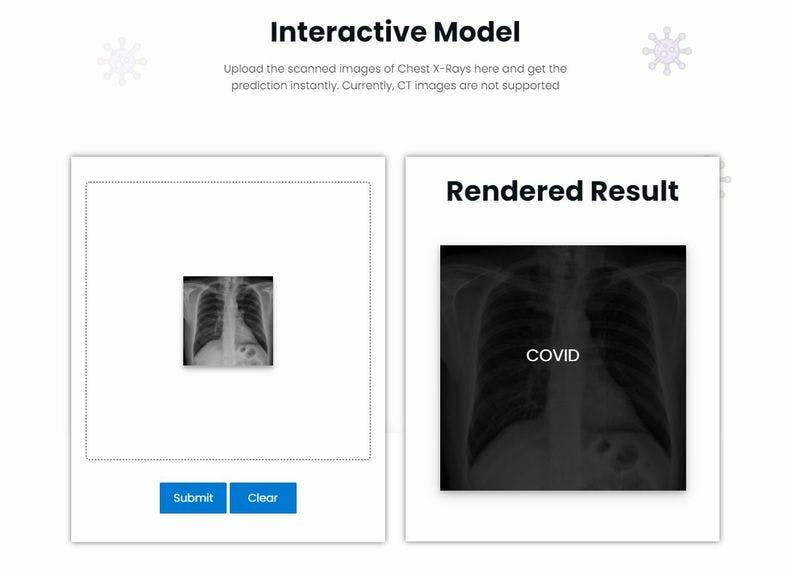
The prediction is possible through the integration of the COVID-19 X-Ray Classifier into a Web Application. By uploading Frontal Chest X-Rays, the model can perform classification between COVID and non-COVID X-Rays using Modified DenseNet architectures.
The users are given the option to save the results to the Database to receive further advice from doctors. The data is stored securely in MongoDB. Apart from that, REST API has been provided for Developers to access the Deep Learning Model and get prediction data in their applications. I have also enabled monitoring facilities for the application.
The entire project was hosted on the Civo Kubernetes Platform.
How I built it
The project kickstarted with the Development of the Web Application. The UI was finalized and then the application was developed. Several open-source styles, libraries and toolkits were used during the development of the Frontend with HTML, CSS and JavaScript.
After completion, the backend of the application was developed with Python & Flask framework. The routes were created and mapped to the Frontend. The Deep Learning Model was integrated with the backend REST APIs. Various libraries such as Numpy, Pillow and Tensorflow was used to manage the model. Finally, MongoDB was integrated with the backend to save the Form data.
This completed the Web Application Development.
The next stage involved deploying the application on Civo K3s Cluster by developing an automated DevOps CI/CD Pipeline. First, the entire application code was pushed to a GitHub repository. Through this step, the code version control is ensured and any change in the code would automatically trigger the entire pipeline.
To deploy applications on K8s, the application needed to be containerized. The building of the Docker container should automatically take place once any code gets changed. After building the container, it needs to be pushed to a Docker Repository, here Dockerhub. Also, the old Docker Image Tag mentioned in the code would need to be replaced by the new Docker Image Tag. For automating all these, a Continuous Integration Pipeline was created with the help of Github Actions as the CI tool.
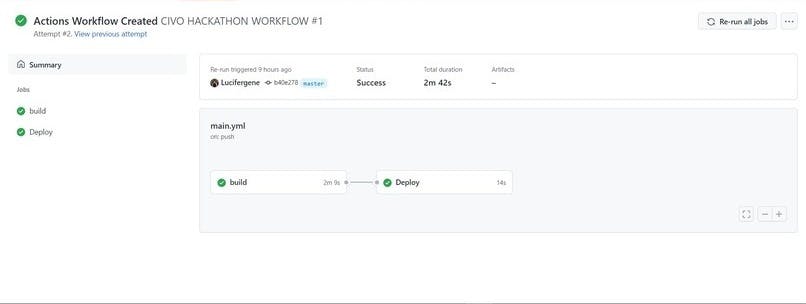
A workflow file was written to sequence the jobs that needed to be performed, once the code get changed in the repository. The jobs involved building and pushing the Docker container to Dockerhub. After pushing, the new container tag replaced the older one mentioned in the customization file automatically, with the help of Kustomize.io. The Deployment, Service and Ingress YAML files were pushed to the repository as K8s needed these files during deployment.
Github Actions Workflow file:
name: CIVO HACKATHON WORKFLOW

on:
  push:
    branches: [ master ]

jobs:

  build:
    runs-on: ubuntu-latest
    steps:
      - uses: actions/checkout@v2
      - name: Build and push Docker image
        uses: docker/build-push-action@v1.1.0
        with:
          username: ${{ secrets.DOCKER_USER }}
          password: ${{ secrets.DOCKER_PASSWORD }}
          repository: ${{ secrets.DOCKER_USER }}/civo-hackathon
          tags: ${{ github.sha }}, latest


  deploy:
    name: Deploy
    runs-on: ubuntu-latest
    needs: build

    steps:
    - name: Check out code
      uses: actions/checkout@v2

    - name: Setup Kustomize
      uses: imranismail/setup-kustomize@v1
      with:
        kustomize-version: "3.6.1"

    - name: Update Kubernetes resources
      env:
        DOCKER_USERNAME: ${{ secrets.DOCKER_USER }}
      run: |
       cd kustomize/base
       kustomize edit set image civo-hackathon=$DOCKER_USERNAME/civo-hackathon:$GITHUB_SHA
       cat kustomization.yaml

    - name: Commit files
      run: |
        git config --local user.email "action@github.com"
        git config --local user.name "GitHub Action"
        git commit -am "Bump docker tag"
    - name: Push changes
      uses: ad-m/github-push-action@master
      with:
        github_token: ${{ secrets.GITHUB_TOKEN }}
This completed the Continuous Integration process.
The final stage was to deploy the Docker Image pushed in DockerHub, into a CIVO k3s Cluster. For this, a K3s cluster was created on Civo. Due to CPU intensive nature of the application, the Largest Node configuration was selected. Then through the Civo CLI, the KubeConfig file was connected with the local KubeCTL tool.
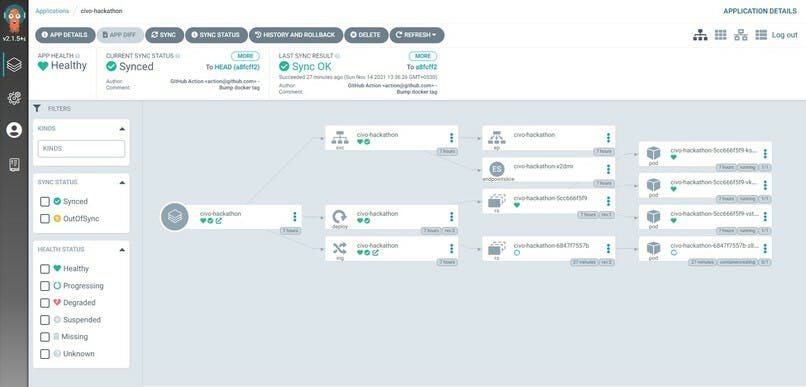
Through KubeCTL, a namespace was created and ArgoCD was installed in it. Inside ArgoCD, the configuration was provided to continuously track the GitHub Repository for changes in the Kustomization file.
Since previously through CI, we had managed to update the Kustomization file after a new code change took place, this update in the Kustomization file triggered the ArgoCD to re-deploy the application based on the newer Docker Image Tag provided. Thus after an initial manual Sync, ArgoCD managed to complete the Continuous Deployment process.
The CI/CD Pipeline was successfully created which helped to automatically deploy code changes to production.
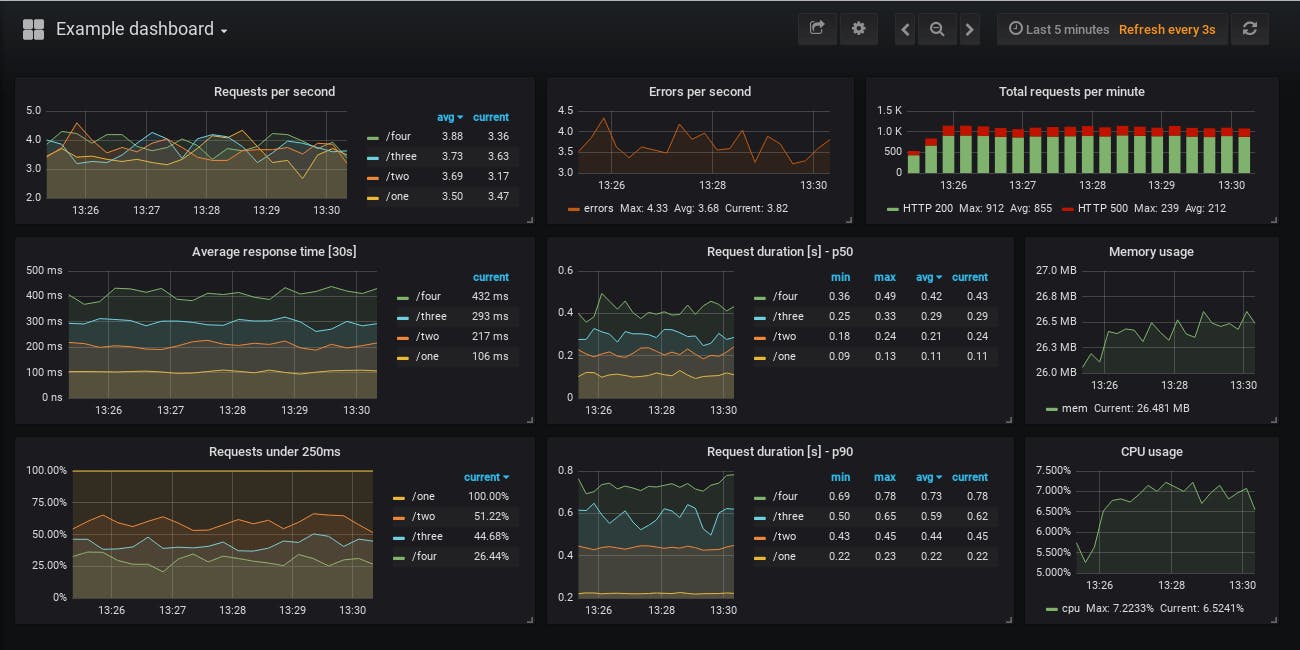
After the application was properly working, I proceeded with installing Prometheus and Grafana in a separate namespace in the cluster to fetch and visualize the metrics. For that, I edited the Flask application to make it generate metrics to be fed to Prometheus.
Then I developed a Service Monitor for exposing the metrics endpoint of the application which in turn would be automatically added to the Prometheus Target group. Now, I was able to fetch metrics into Prometheus from the Web application. After that, I set up the Grafana Dashboard to visualize the metrics.
This finally concluded the project.
My Experience
Overall, I had a great experience learning and executing new things within a short span of time. The process of deployment could not be made smoother without the Civo Platform. The fact that we can launch a cluster within a few minutes, along with having a marketplace from where we can pick services we want to preinstall in the cluster, really simplified the process for newbie Kubernetes developers like me.
Apart from that, the presence of the Kubernetes academy which contains beginner-friendly videos about all the different features of K8s, integrated into the platform, helped me to quickly navigate and get my doubts cleared before applying stuff on my cluster.
And of course, we had the option of directly contacting the Civo team via Slack to get out queries resolved. Special thanks to Saiyam Pathak, for his Monitoring video, which really helped me set up the monitoring stack easily.
What's next for the project
Although I tried my best to incorporate all the domains of DevOps into my application, still there are some places that need attention.
First and foremost, I tried to incorporate the GitOps principle as much as possible, which included pushing the application code, Kubernetes Manifests as well as Terraform scripts to the Git. But still, there were some settings that I had to manually set inside the cluster like setting up the ArgoCD. Since ArgoCD supports GitOps, I would be declaring the settings from Git itself.
Apart from that, I would be incorporating some Logging and Profiling tools in the cluster, that would give a better picture of the application deployment.
Last but not the least, the model which has been deployed can currently perform classification only. But recently, in some researches, it has been proved that through Instance Segmentation on the X-Rays, we can actually measure the severity of the spread of the virus by precisely identifying the locations of the GGOs. In the future, I want to integrate such a model with the application, so that users can also measure the severity of the virus instantly.
You can visit the repository from below:
Demo : covid-predictioned.herokuapp.com
DevPost : devpost.com/software/covid-19-prognosis
Civo - civo.com
You can reach out on my Twitter, Instagram, or LinkedIn if you need more help. I would be more than happy.